Tuesday 10 June 2014

Hama-Rikyu Garden - History and Beauty Combined

This Garden was originally part of the estate of an Edo period Shogun who ruled in the 1650s. The main pool is tidal and is still fed by the seawater of the bay through two sluice gates. There used to be a villa here and it is where the Shogan would go if he wanted to show off his boats to visitors - in fact it is still used as a dock for one of the river boat services that run in Tokyo. The Emperor gifted the Garden to the city in the 1950s and the tea houses, destroyed during WW2, were very carefully rebuilt in the original style. The garden is now surrounded by high rise buildings (in particular the Conran Hotel) and has a stonking great dual carriageway along one side. Inside it is peaceful and idyllic though. It costs a whopping £2 to get in and I easily spent 2 hours there - I would have spent longer if I'd brought something to eat. Now, I'll just leave you with the photos.
Hama-Rikyu Garden Through the Road
Hama-Rikyu Garden Iris
Hama-Rikyu Garden Tree Roots and Stones
Hama-Rikyu Garden Panorama
Hama-Rikyu Garden Bridge
Hama-Rikyu Garden View
Hama-Rikyu Garden Wisteria Trellis
Hama-Rikyu Garden Steps
Hama-Rikyu Garden Bridge
Hama-Rikyu Garden Wedding Couple
Hama-Rikyu Garden Iris
Hama-Rikyu Garden Lantern with Iris
300 Year Old Pine Front View
300 Year Old Pine side view
Those last two are the front and side view of a 300 year old pine. It's height is only 11ft but that main branch coming out at 90 degrees is 18 feet long and the breadth of the branches coming off it was, I dunno, 30 feet maybe? I should also explain that the kimono couple weren't just mooning about in the garden like that. They had a photographer and two attendants with them and were taking wedding photos. I thought I'd just nip in and capture the moment and help spread the love.

Unfortunately I went to the garden without any sunscreen on because it was 100% cloud cover.

Not my finest assumption.

Ow.

I am now hugely sunburnt in a stripey bagpuss-esque painful style. The thick straps of my vest top are stark white but annoyingly so too are where the lanyard around my neck lay. So I am literally striped. In fact, here's a photo Pooch took of me blogging on the sofa.
DSC00007.JPG
I tried an internet remedy of socaking a towel in black and tea and then draping it over you. I ended up smelling of very very strong tea and it didn't help. A friend has suggested Aloe Vera gel which thankfully they do have in Japan (at least, I think it is aloe vera gel. It's possible I'm about to smear myself in sea urchin juice or something similar)  so I have some in the fridge which I'll apply shortly.

Friday 6 June 2014

Scrap Swap Time!

scrap swap

I am the organiser of this one. Click on the image to sign up!


Yukata Update - Class 2

I blogged about the first Yukata making class here. The second day was last weekend and very good fun. The organiser actually made a 30 second video of it which I've embedded below.
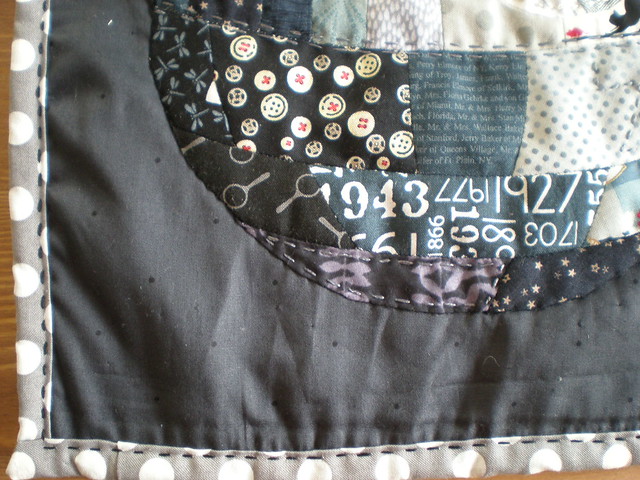
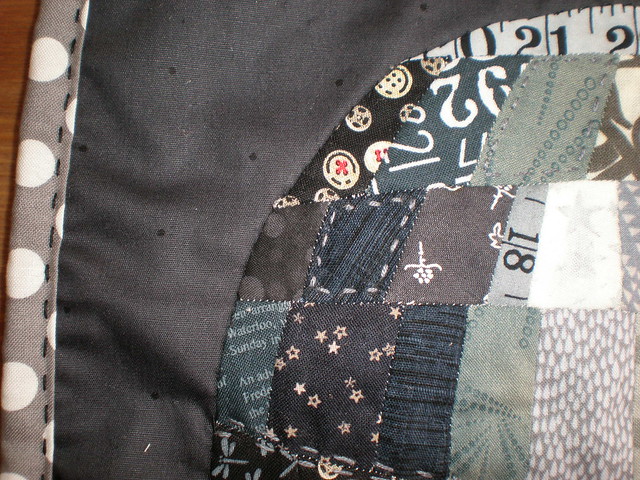
I was discussing this with Natalie and describing the stitches we used when she said she hoped I'd be blogging about them. Hum. So here they are, although the photos were taken with my old camera, hence slightly dodgy focusing. (Everything beyond this point will only make sense if you know how to sew.)

Things to remember while looking at this - the long edges of the fabric are already finished because it is only about 35cm wide (but 12m long) when bought. Therefore there is no chance of these fraying. In addition the fabric is very heavily starched when you buy it so takes a folded crease very well and this also lessens the chance of any fraying while you work on the hems. Lastly, the fabric itself is quite densely woven cotton, so yet again the chance of fraying is minimal. 

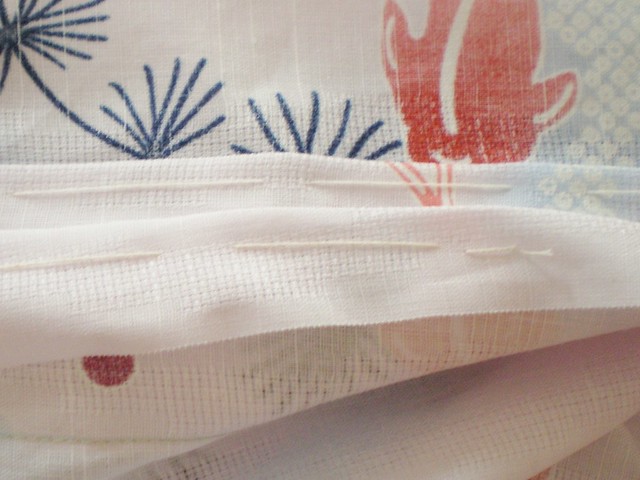
First we have the tacking done by the teacher. 
Yukata Stitching Close Up
Fairly standard and used a cream version of the white thread we were all using - a 30wt or 30/3 cotton.

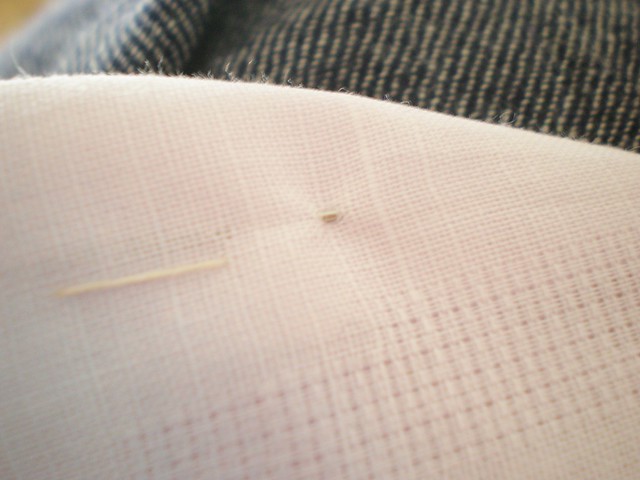
The Sensai (just like Karate Kid) taught us two stitches - one for finishing hems and one for hemming edges. The seams around the arm holes on the sleeve and the bottom hem were done with the latter, which looks like this on the outside (I've left the needle in so you can see the stitch):
Yukata Stitching Close Up
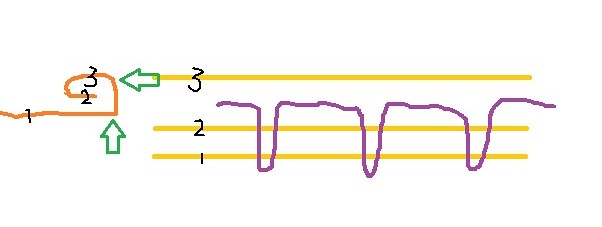
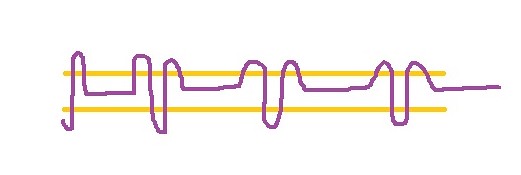
- but cannot be seen at all on the inside. I've tried to draw a diagram showing how it works, but don't laugh. 
yukata stitch 1 diagram
Once you've stopped laughing, you'll realise that 1 is the 'main' piece of cloth and 2 and 3 are the layers of cloth you get when you fold it at the hemline in the two places shown by the green arrows. So it's folded over twice to give a neat hem - nothing unusual there. What is unusual though is you get no sign of any stitching on the inner edge - above layer 3 in the diagram. The only sign of stitching you get is on the outside - below layer 1 in the diagram. Hence you get what you see in the photo above. 

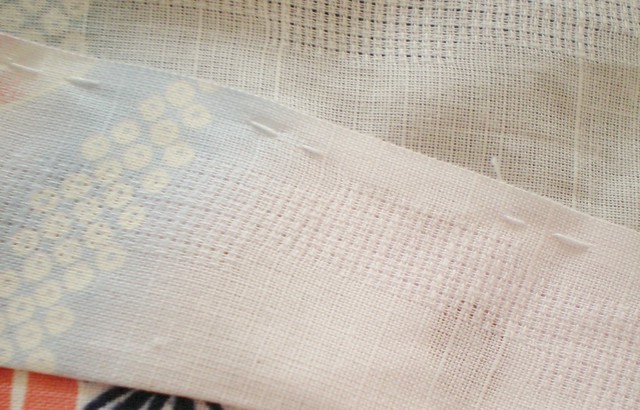
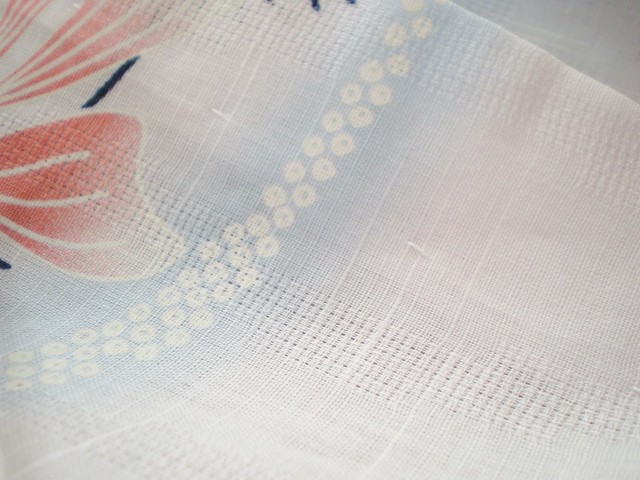
The second stitch is worked on the long seams and is essentially just to make them look neat and fasten them down since the edge of the fabric is already finished. This stitch is visible on both the inside and outside of the garment. Inside first:
Yukata Stitching Close Up
And outside:
Yukata Stitching Close Up
And the comedy diagram:
yukata stitch 2 diagram

I did ask why the stitches were visible on the outside - they can be done much more subtly than this - but the teacher essentially said that this is the way Yukata are made so this is how we do it.

It has been really fascinating watching the teacher and her helpers work and seeing how a traditional garment is sewn. I want to incorporate some of the techniques in the Sashiko Jacket I have planned which I got the fabric for from Nippori last week, 
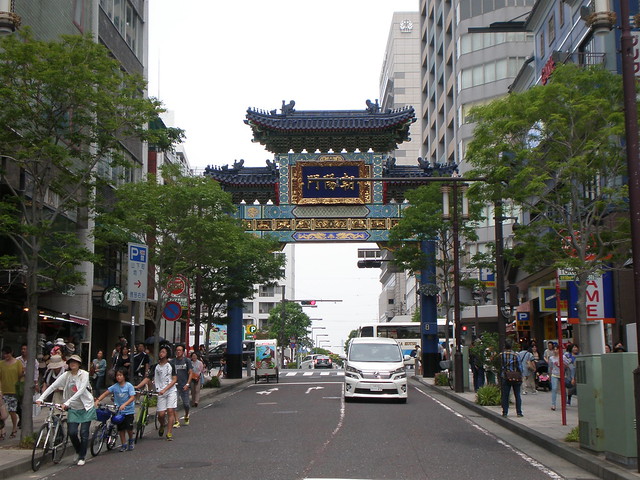
when I took the photos for that blogpost

One more class is needed before it is finished but I will be taking lots of photos of the finished project and there is one more thing I need to cover - the enclosing of the long seams by folding. The final class isn't for another 2 weeks but as soon as I can I will show it off to you all!


Thursday 5 June 2014

Testing My New Camera

I've been getting annoyed with the performance of my camera recently - specifically the lack of focus if the flash is turned off - so I decided it was time for a new one. Usually I am loathe to replace something until it is broken but when I thought about it the camera was given to me by my sister when she broke up with the boyfriend before the boyfriend before the man she married who she is now divorcing. So it is at least 7 years old and that is a lifetime in electronics.

I went for a Samsung with built-in wifi, good zoom abilities and a large touch-screen on the back so you can manually choose the focus point.
The picture links to Amazon although the price is about £20 higher than when I bought it a month ago (when it was about 65% off) so if you are looking for one you might want to see if the price goes down again in the next few weeks. 

I had it forwarded on from the UK since these things are uber expensive here and it arrived last week. I clearly needed to take it for a test drive, but where to go? I checked what I had taken the most photos of since I had arrived and the answer became clear. 
Cat Cafe Ebisu
Cat Cafe Ebisu
Cat Cafe Ebisu
Cat Cafe Ebisu
Bruiser was in a particularly malevolent mood and moved each time he caught me looking at him so I could only snap him from behind. I can't help thinking he is one rescue cat who did not appreciate being rescued. 

The camera has a few fun features like this split mode, although you can have other arrangements of sections. 
Cat Cafe Ebisu
And then there is the picture within a picture. 
Cat Cafe Ebisu
Bit odd but I am sure there is a use for it somewhere along the line.  

I have some more conventional tests for it planned for the great outdoors but I'm happy with the cat close ups so as far as I'm concerned this is a good choice for a new camera!

Wednesday 4 June 2014

May Makes

A busy month for crafting.
May Makes
The little shrink plastic charm that I blogged about here has had to be binned. I found some uv resin and globbed it on a little too enthusiastically and stuck it to the board I'd put it on to dry. In trying to detach it the thing snapped. Let's face it, it was doomed from the start. Shame really. Let us never talk of it again.

I don;t seem to have mentioned the coat hanger thingy. Inspired by pinterest, and the best way to store vest tops if you don't have any shelves. The s-hooks were sliding on the coat hanger until I wound some chunky novelty yarn around it, secured at each end with tape. Not exactly a beautiful item, but highly functional.

I didn't blog about the death star? That was Pooch's 10 year anniversary present from me and deserves to be seen in more detail...
Patchwork Deathstar Complete
Patchwork Deathstar Detail 1
Patchwork Deathstar Detail 2
Done all by EPP using the FREE pattern from Quirky Granola Girl. For her to give it away free makes her a nominee for blogger of the year in my book.

Lastly we have the 52 stars of the blue and white EPP quilt I am making for my parents. This is by no means the majority as I need another 70 or so and then there are all the joining hexagons and diamonds to add. I have most of them prepared so it is 'just' putting it all together now.
52 stars completed
It's been a learning curve because my Mum was with me when I bought many of the fabrics and I never would have chosen those cutesy animal prints for her.
Blue Patchwork stars
But she likes them so that is the main thing.

I have already been making in June so more to come on that once I've caught up with blogging about my adventures. I seem to have been at least a week behind for the last month or so.

Chinese Style

Yokohama is about 30 minutes from Tokyo and allegedly the largest Chinatown outside China. Pooch and I had been meaning to visit since we arrived and last weekend we finally made it.
Chinatown Sign
It is a place of many gates.
Gate
Gate
Gate
Gate
Also of places selling things covered in pandas.
Panda Shop
Panda Shop
Or just creepy animatronics of them in their doorways.
Creepy Mechanical Panda
Plus a man with a crab on his head.
Man with a Crab on his Head

We had a lovely time meandering past food stalls and trying the odd thing before settling on a restaurant for a very nice lunch.
Steam Buns
022
017
Jasmine Tea

There were some big boats in the harbour - a japanese navy boat you could look round and a huge cruise ship backing out of port.
Boat
There was also a doll museum which we didn't visit, but which reminded me of a book Natalie and I saw when we went craft shopping the other day. I was at the till and Natalie had picked it up to flick through. I saw her expression change and she showed me what she'd chanced upon. The book was A4 and very thick and was a step by step photographic how to make a realistic doll of a pre-pubescent girl. The age of the girl being indicated quite specifically by the genitals and breast area, both of which were shown being very carefully carved, sanded and polished. Very carefully. Very specifically. Very realistic looking doll. We backed away from the book.

A jaunt around the park finished our day off.
040
We headed back to Tokyo full of food and pleasantly cultured!